How to Add and Manage Currency
Ready to expand your business globally? This guide will show you exactly how to add and manage multiple currencies in Gelacy, making it easy for customers worldwide to shop in their preferred currency and boost your international sales.
I. How to Add Currency
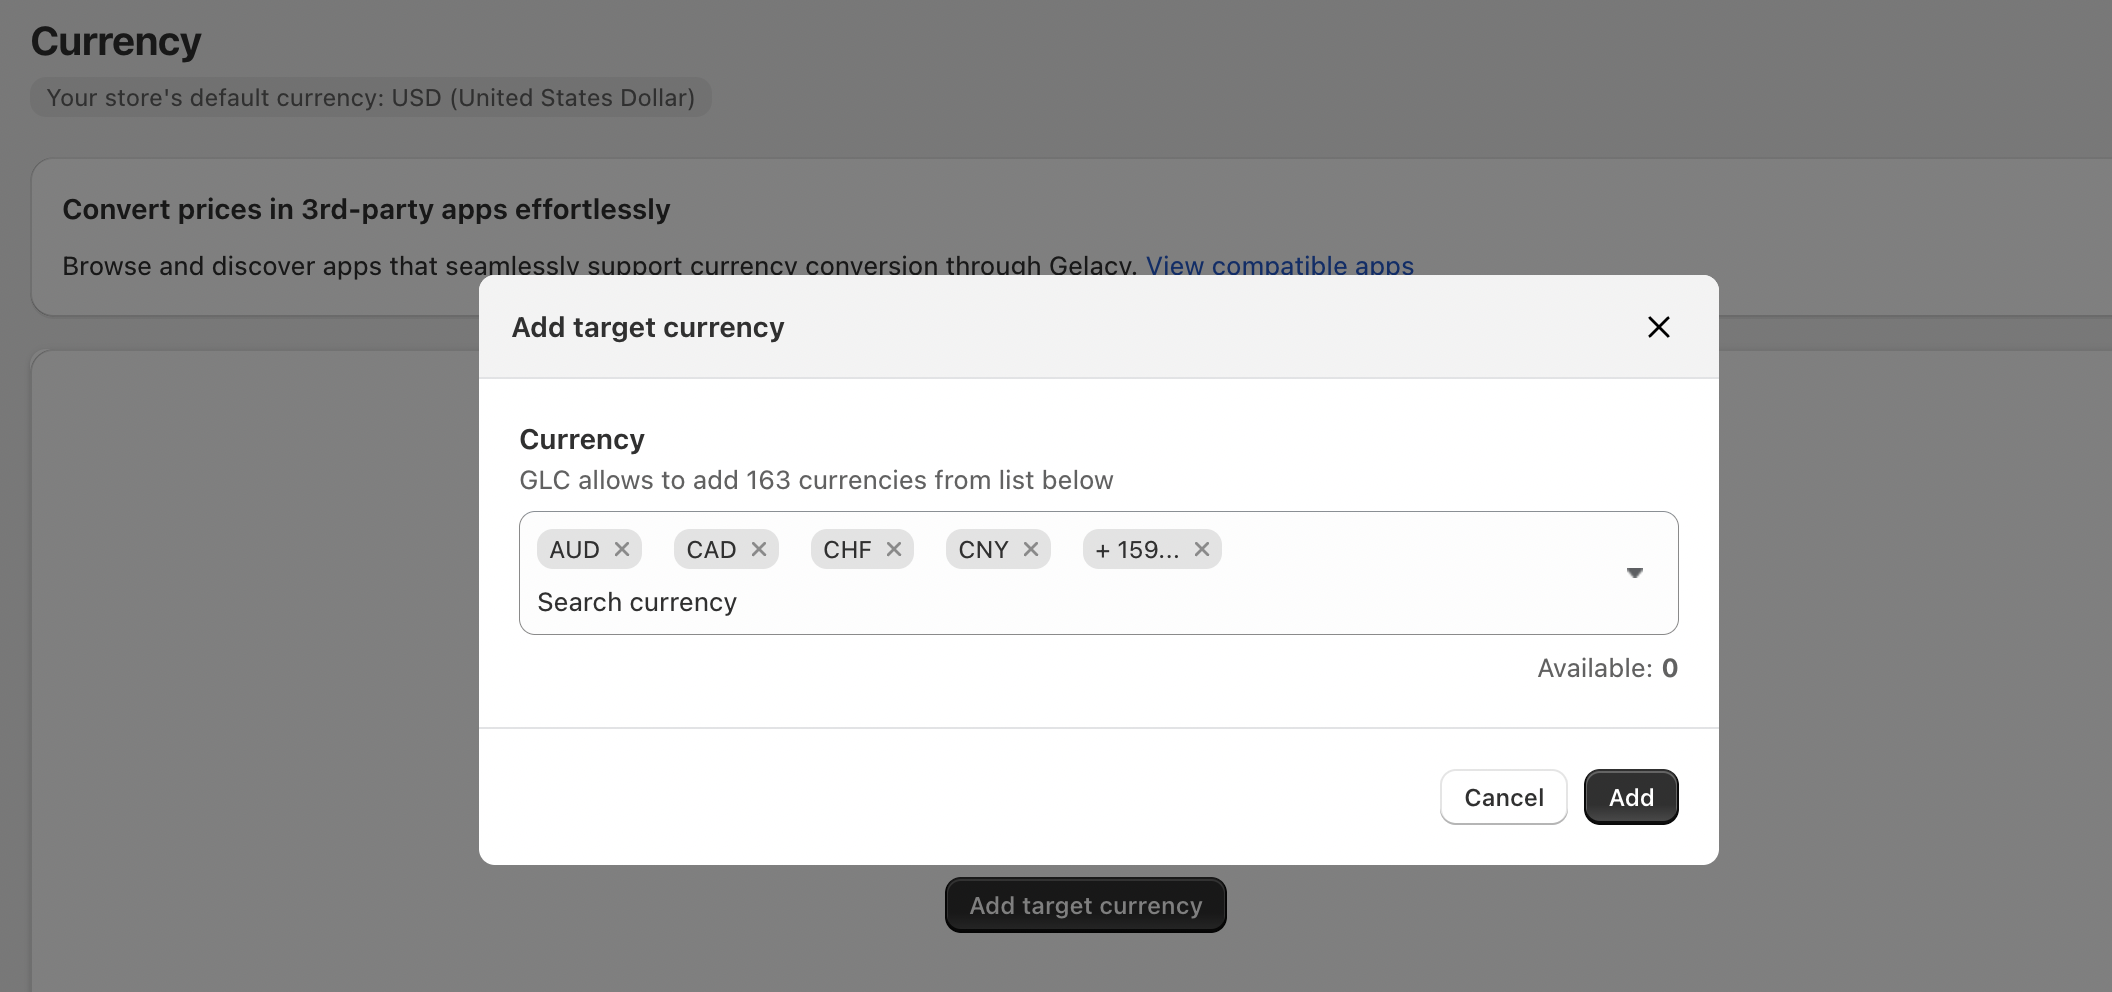
Adding new currencies to your store is simple and takes just a few clicks:
- Click on the
Currencymenu in your Gelacy dashboard. - Click the
Add currencybutton in the top-right corner. - Select your desired currency from the dropdown list.
- Click Add.
II. How to Manage Currency
Once you've added currencies, you'll need to configure them to display properly on your storefront.
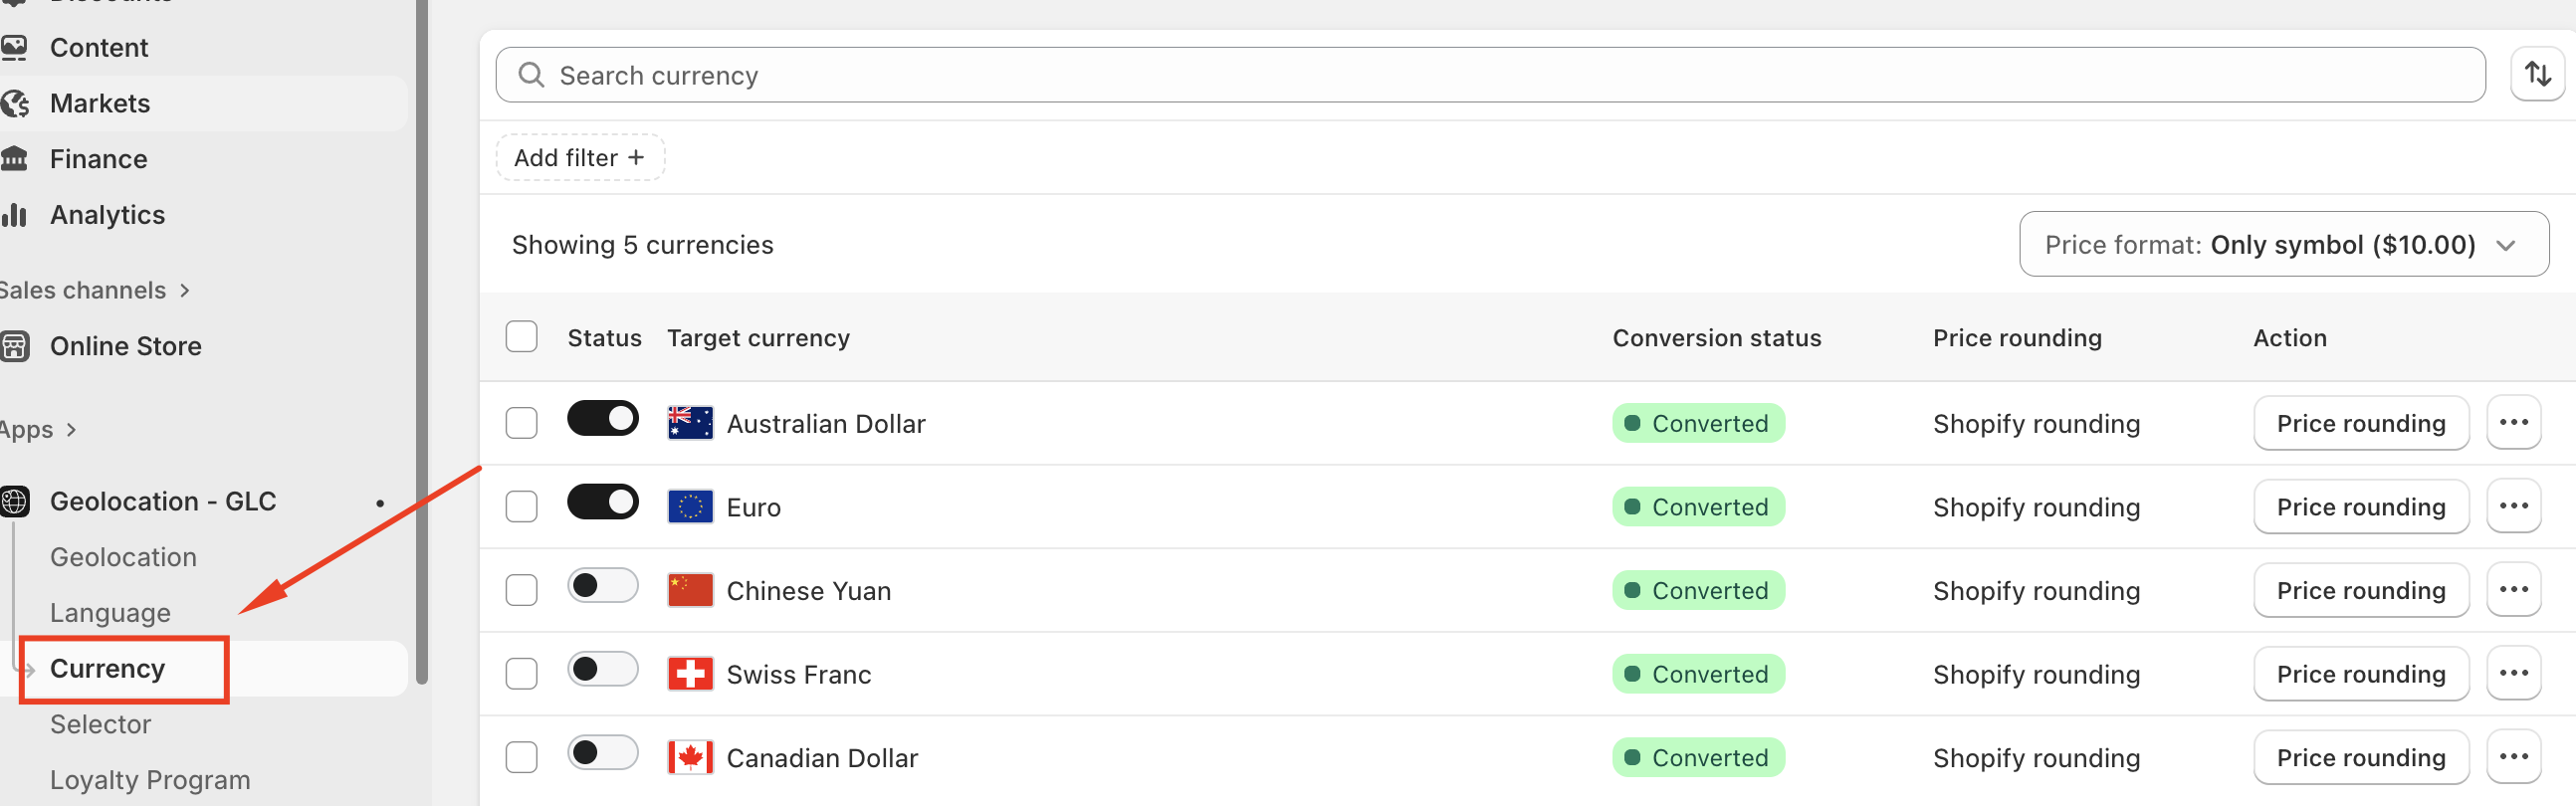
Getting Started with Currency Management
Head to the Currency menu to access all currency settings.
Essential Setup Steps
1. Set Up Currency Codes
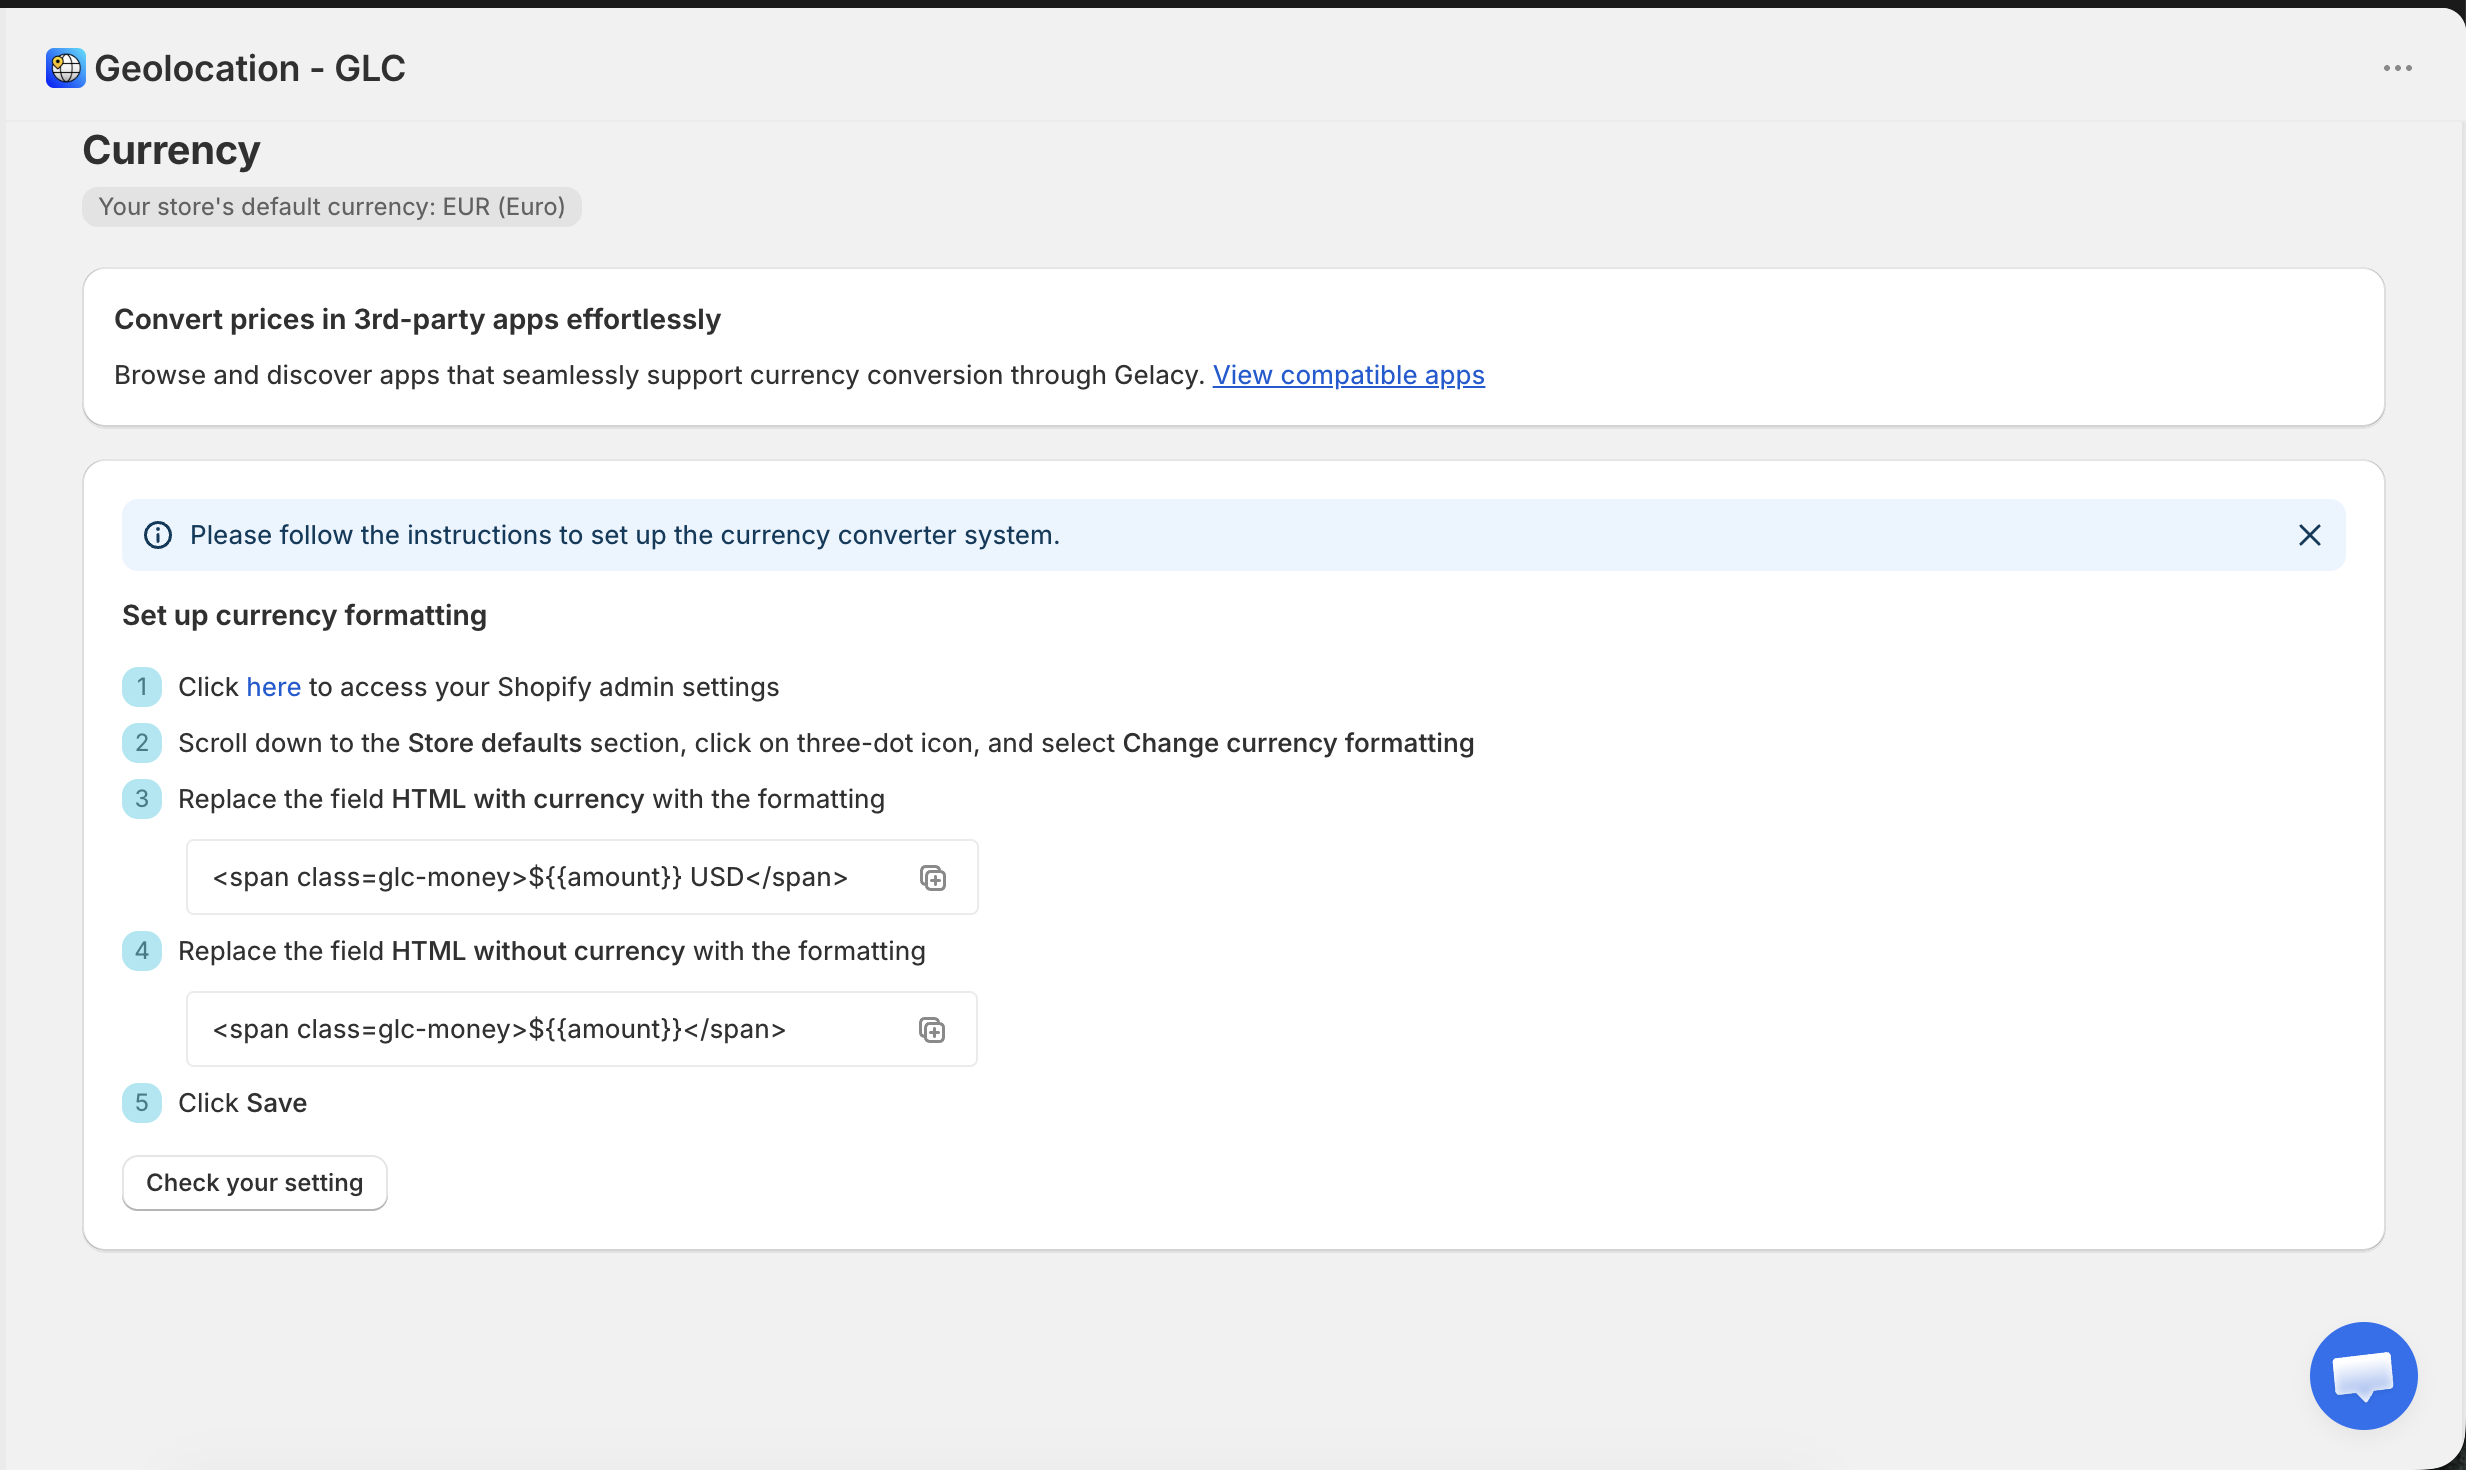
This is your first and most important step.
- Proper currency codes ensure smooth price conversion from your default currency to target currencies.
- Accurate configuration helps avoid conversion and display issues.
2. Publish and Customize Your Currencies
After adding currencies, configure how they appear and behave on your store:
- Make currencies visible on your store's currency switcher.
- Customize currency formats to match local preferences.
- Adjust exchange rates as needed.
3. Manage Currency Visibility
You can control which currencies are available to customers:
- Publish/Unpublish: Control which currencies appear on your store.
- Remove: Delete currencies you no longer need.
Final Touch: Set Up Your Currency Selector
Don't forget to configure your Gelacy selector so customers can easily switch between currencies and languages on your store.
Tip for Shopify Markets Users
If you're using Shopify Markets with Shopify Payments, be sure to enable multi-currency checkout to allow currency conversion during checkout as well.
If you have questions or need help setting up, feel free to contact our support team at [email protected].